Friday, 20 May 2016

Opencv C++ code of Operation on Arrays:absdiff


Here is the OpenCv C++ Example on Operation on Arrays by using absdiff()
It calculates the per-element absolute difference between two arrays or between an array and a scalar.


Syntax:
C++: void absdiff(InputArray src1, InputArray src2, OutputArray dst)


Parameters:
src1 – first input array or a scalar.
src2 – second input array or a scalar.
src – single input array.
value – scalar value.
dst – output array that has the same size and type as input arrays.


Here is the Opencv Code for calculating absolute difference of each element of matrix.
//Opencv C++ Example of Operation on Arrays:absdiff  
#include "opencv2/highgui/highgui.hpp"
#include "opencv2/imgproc/imgproc.hpp"
#include <iostream>
 
using namespace cv;
using namespace std;
 
int main( )
{
 
    Mat image1,image2,dst;
    image1 = imread("C:\\Users\\arjun\\Desktop\\opencv-logo.jpg",CV_LOAD_IMAGE_COLOR);
    if( !image1.data ) { printf("Error loading image1 \n"); return -1;}
    image2 = imread("C:\\Users\\arjun\\Desktop\\opencv-test.png",CV_LOAD_IMAGE_COLOR);
    if( !image2.data ) { printf("Error loading image2 \n"); return -1;}
           
    absdiff( image1,  image2,  dst);
  
    namedWindow( "Display window", CV_WINDOW_AUTOSIZE );  
    imshow( "Display window", image2 );                 

    namedWindow( "Display windo", CV_WINDOW_AUTOSIZE );  
    imshow( "Display windo", image1 );         

    namedWindow( "Result window", CV_WINDOW_AUTOSIZE );   
    imshow( "Result window", dst );
    
    //imwrite("C:\\Users\\arjun\\Desktop\\opencv-dst.jpg",dst);
    waitKey(0);                                         
    return 0;
}


Input Image1:


Input Image2:


Output Image:

Friday, 6 May 2016

Opencv C++ code of Operation on Arrays:subtract


Here is the OpenCv C++ Example on Operation on Arrays by using subtract() function.
It calculates the per-element difference between two arrays or array and a scalar.


Syntax:
C++: void subtract(InputArray src1, InputArray src2, OutputArray dst, InputArray mask=noArray(), int dtype=-1)


Parameters:
src1 – first input array or a scalar.
src2 – second input array or a scalar.
dst – output array of the same size and the same number of channels as the input array.
mask – optional operation mask; this is an 8-bit single channel array that specifies elements of the output array to be changed. dtype – optional depth of the output array (see the details below).


We can also use:
dst=image1-image2;


//How to subtract two images in OpenCV
#include "opencv2/highgui/highgui.hpp"
#include "opencv2/imgproc/imgproc.hpp"
#include <iostream>
  
using namespace cv;
using namespace std;
  
int main( )
{
  
    Mat image1,image2,dst;
    image1 = imread("C:\\Users\\arjun\\Desktop\\opencv-logo.jpg",CV_LOAD_IMAGE_COLOR);
    if( !image1.data ) { printf("Error loading image1 \n"); return -1;}
    image2 = imread("C:\\Users\\arjun\\Desktop\\opencv-test.png",CV_LOAD_IMAGE_COLOR);
    if( !image2.data ) { printf("Error loading image2 \n"); return -1;}
            
    subtract( image1,image2, dst);
    //dst=image1-image2;
 
    namedWindow( "Display window", CV_WINDOW_AUTOSIZE );  
    imshow( "Display window", image2 );                 
 
    namedWindow( "Display windo", CV_WINDOW_AUTOSIZE );  
    imshow( "Display windo", image1 );         
 
    namedWindow( "Result window", CV_WINDOW_AUTOSIZE );   
    imshow( "Result window", dst );
     
    //imwrite("C:\\Users\\arjun\\Desktop\\opencv-dst.jpg",dst);
     waitKey(0);                                         
     return 0;
}

OpenCV-Input1:
OpenCV-Input2:
OpenCV-Output:

Opencv C++ code of Operation on Arrays:add


Here is the OpenCv C++ Example on Operation on Arrays by using add() function.
It calculates the per-element sum of two arrays or an array and a scalar.

Syntax:
C++: void add(InputArray src1, InputArray src2, OutputArray dst, InputArray mask=noArray(), int dtype=-1)

Parameters:
src1 – first input array or a scalar.
src2 – second input array or a scalar.
src – single input array.
value – scalar value.
dst – output array that has the same size and number of channels as the input array(s); the depth is defined by dtype or src1/src2.
mask – optional operation mask - 8-bit single channel array, that specifies elements of the output array to be changed.
dtype – optional depth of the output array (see the discussion below).

We can also use
dst=image1+image2;

Here is the Opencv Code for calculating the per-element sum of two arrays or an array and a scalar.
//Opencv C++ Example of Operation on Arrays:add 
#include "opencv2/highgui/highgui.hpp"
#include "opencv2/imgproc/imgproc.hpp"
#include <iostream>
 
using namespace cv;
using namespace std;
 
int main( )
{
 
       Mat image1,image2,dst;
       image1 = imread("C:\\Users\\arjun\\Desktop\\opencv-logo.jpg",CV_LOAD_IMAGE_COLOR);
    if( !image1.data ) { printf("Error loading image1 \n"); return -1;}
    image2 = imread("C:\\Users\\arjun\\Desktop\\opencv-test.png",CV_LOAD_IMAGE_COLOR);
    if( !image2.data ) { printf("Error loading image2 \n"); return -1;}
           
    add( image1,image2, dst);
    //dst=image1+image2;

       namedWindow( "Display window", CV_WINDOW_AUTOSIZE );  
       imshow( "Display window", image2 );                 

    namedWindow( "Display windo", CV_WINDOW_AUTOSIZE );  
       imshow( "Display windo", image1 );         

       namedWindow( "Result window", CV_WINDOW_AUTOSIZE );   
       imshow( "Result window", dst );
    
    //imwrite("C:\\Users\\arjun\\Desktop\\opencv-dst.jpg",dst);
       waitKey(0);                                         
       return 0;
}

Input Image1:

Input Image2:

Output Image:

Wednesday, 20 April 2016

Opencv C++ Code For Solving Maze


This OpenCV C++ Tutorial is about solving mazes using Simple Morphological transformation.
The script works for only perfect mazes, i.e the maze which has one and only one unique solution,no subsections,no circular area and no open areas.
These kind of perfect mazes can be generated using online maze generation tools.
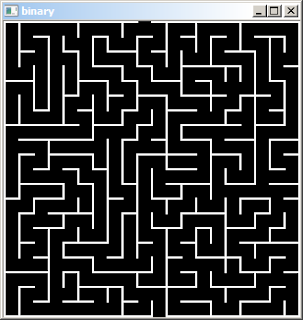
Lets take this simple maze as test image:
The steps for Solving Perfect Mazes are:
1. Load the Source Image.
2. Convert the given image into binary image.
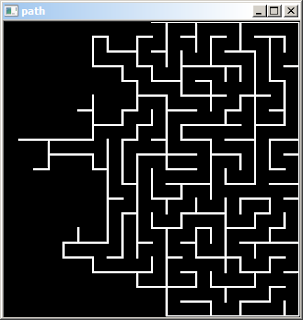
3. Extract Counters from it.
Now the External Counter for a perfect maze is 2(because the perfect maze has only 2 walls).
So if the given Maze is perfect,it would have 2 External Counters,then proceed with the logic below
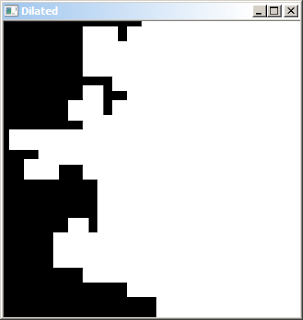
4. So select any one wall, and dilate and erode the ways by the same amount of pixels.
5.Subtract the eroded image from the dilated image to get the final output i.e the solution of the maze.
//Opencv C++ Program to solve mazes using mathematical morphology
#include <opencv2/highgui/highgui.hpp>
#include <opencv2/imgproc/imgproc.hpp>
#include <cmath>
#include <iostream>

using namespace cv;
using namespace std;

int main()
{
    Mat src = imread("C:\\Users\\arjun\\Desktop\\opencv-maze-generator.png");
    if( !src.data ) { printf("Error loading src \n"); return -1;}

 //Convert the given image into Binary Image
    Mat bw;
    cvtColor(src, bw, CV_BGR2GRAY);
    threshold(bw, bw, 10, 255, CV_THRESH_BINARY_INV);

 //Detect Contours in an Image
    vector<std::vector<cv::Point> > contours;
    findContours(bw, contours, CV_RETR_EXTERNAL, CV_CHAIN_APPROX_NONE);

    if (contours.size() != 2)
    {
        // "Perfect maze" should have 2 walls
        std::cout << "This is not a 'perfect maze' with just 2 walls!" << std::endl;
        return -1;
    }

    Mat path = Mat::zeros(src.size(), CV_8UC1);
    drawContours(path, contours, 0, CV_RGB(255,255,255), CV_FILLED);
 
 //Dilate the Image
    Mat kernel = Mat::ones(21, 21, CV_8UC1); 
    dilate(path, path, kernel);

 //Erode the Image
    Mat path_erode;
    erode(path, path_erode, kernel);

 //Subtract Eroded Image from the Dilate One
    absdiff(path, path_erode, path);

 //Draw the Path by Red Color
    vector<Mat> channels;
    split(src, channels);
    channels[0] &= ~path;
    channels[1] &= ~path;
    channels[2] |= path;

    Mat dst;
    merge(channels, dst);
    imshow("solution", dst);
    waitKey(0);

    return 0;
}

1. Input :


2. After converting the given Image to Binary :


3. After detecting Contours:


4. After Dilation:


5. After Appying Erosion:


6. After Subtracting Dilated Image from the Eroded:


7. Tracing the path with red Color(Final Output):

Thursday, 14 April 2016

How to Put/Overlay/Place/Copy Small Image over the Bigger One

This Opencv C++ tutorial is about placing a smaller image over the Bigger one.
Now, In order to overlay one image over the other we need to get the point where we should place the Smaller Image.
And also we need to create a Region of Interest(ROI) on the bigger image.
Thus the Logic of the Code would be:
1. Read the Bigger Image
2. Read the smaller Image
3. Create a Region of Interest over the bigger Image
    cv::Mat small_image;
    cv::Mat big_image;
    ...
   //Somehow fill small_image and big_image with your data
   ...
  small_image.copyTo(big_image(cv::Rect(x,y,small_image.cols, small_image.rows)));
  Refer the Opencv C++ Code below:

//Copying One Image/Overlaying one image over the other
#include <opencv2/core/core.hpp>
#include <opencv2/highgui/highgui.hpp>
#include <iostream>

using namespace cv;
using namespace std;

int main()
{
 Mat src1,src2;
 src1=imread("C:\\Users\\arjun\\Desktop\\image1.jpg",1);
 src2=imread("C:\\Users\\arjun\\Desktop\\opencv-logo.png",1);
 if(!src1.data)
 { cout<<"Error loading src1"<<endl; return -1;}
 if(!src2.data)
 { cout<<"Error loading src2"<<endl; return -1;}
 if(src1.size <= src2.size)
 { cout<<"Error First Image should be larger than Second Image"<<endl;}
 src2.copyTo(src1(cv::Rect(10,10,src2.cols, src2.rows)));

 namedWindow("Image Window src1",CV_WINDOW_AUTOSIZE);
 imshow("Image Window src1",src1);

 waitKey(0);
 return(0);
}

Input Image1(Bigger Image):

Input Image2(Smaller Image):

Output Image(Overlayed Image):

Note:-
Here we have copied Smaller Image (opencv-logo) over Bigger Image (image1).

Sunday, 10 April 2016

OpenCV C++ Code for putting Text on an Image

This Opencv C++ Tutorial is about putting Text on an Image

In Opencv we can put Text on an Image by using putText() function.
Syntax:
C++: void putText(Mat& img, const string& text, Point org, int fontFace, double fontScale, Scalar color, int thickness=1, int lineType=8, bool bottomLeftOrigin=false )
Parameters:
img – Image.
text – Text string to be drawn.
org – Bottom-left corner of the text string in the image.
font – CvFont structure initialized using InitFont().
fontFace – Font type. One of FONT_HERSHEY_SIMPLEX, FONT_HERSHEY_PLAIN, FONT_HERSHEY_DUPLEX, FONT_HERSHEY_COMPLEX, FONT_HERSHEY_TRIPLEX, FONT_HERSHEY_COMPLEX_SMALL, FONT_HERSHEY_SCRIPT_SIMPLEX, or FONT_HERSHEY_SCRIPT_COMPLEX, where each of the font ID’s can be combined with FONT_ITALIC to get the slanted letters.
fontScale – Font scale factor that is multiplied by the font-specific base size.
color – Text color.
thickness – Thickness of the lines used to draw a text.
lineType – Line type. See the line for details.
bottomLeftOrigin – When true, the image data origin is at the bottom-left corner. Otherwise, it is at the top-left corner.

//Opencv c++ code for Overlaying a Text on an Image
//Opencv c++ code for Putting Text on an Image
#include <opencv2/core/core.hpp>
#include <opencv2/highgui/highgui.hpp>
#include <iostream>

using namespace cv;
using namespace std;

int main()
{
 Mat image;
 image=imread("C:\\Users\\arjun\\Desktop\\opencv-logo.png",1);

 if(!image.data)
 { printf("Error loading image \n"); return -1;}

    putText(image, "opencv-hub", Point(5,100), FONT_HERSHEY_DUPLEX, 1, Scalar(0,143,143), 2);

 namedWindow("Image Window image",CV_WINDOW_AUTOSIZE);
 imshow("Image Window image",image);

 waitKey(0);
 return(0);
}


Input Image:-
OpenCV-logo

Output Image:-
OpenCV C++ Code putText

Note:-Here we have put the text "opencv"  (seen in purple color) over the image.

Thursday, 7 April 2016

Opencv C++ Code For Detecting Lines Inclined at minus 45 degree

This OpenCV C++ Tutorial is about Slant Line Detection i.e. detecting lines inclined at minus 45 degrees
To detect slant lines inclined at -45 degress, we use the mask:
2-1-1
-12-1
-1-12

Thus sliding this mask over an Image we can detect Lines inclined at -45 degrees.
Here is the Opencv C++ Example of Slant Line (lines/edges at 45 degrees)Detection below:

Here is the Opencv C++ Example of Slant Line (lines/edges at 45 degrees)Detection below:
//Opencv C++ Code for detecting line inclined at minus 45 degree
#include <opencv2/core/core.hpp>
#include <opencv2/highgui/highgui.hpp>
#include "iostream"
 
using namespace cv;
using namespace std;
 
int main( )
{
    Mat src1,src2;
 int a;
 Scalar intensity1=0;
    src1 = imread("C:\\Users\\arjun\\Desktop\\opencv-test.jpg", CV_LOAD_IMAGE_GRAYSCALE);
 src2 = src1.clone();

 //If image not found 
 if (!src1.data)                                                                          
     {  
      cout << "No image data \n";  
      return -1;  
     } 

 //Take the Size of Mask
  cout<<"Enter the mask Size =";
  cin>>a;

 //for loop for counting the number of rows and columns and displaying the pixel value at each point
   for (int i = 0; i < src1.rows-a; i++) { 
    for (int j = 0; j < src1.cols-a; j++) { 
   Scalar intensity2=0;
   for (int p = 0; p<a; p++) { 
    for (int q = 0; q<a; q++) { 
    intensity1 = src1.at<uchar>(i+p,j+q); 
       if (p==q)
   {
    intensity2.val[0] +=(a-1)*intensity1.val[0];
   }
       else
   {
      intensity2.val[0] +=(-1)*intensity1.val[0];
   }
   
     }
  
  }
      src2.at<uchar>(i+(a-1)/2,j+(a-1)/2)=intensity2.val[0]/(a*a);
  } 
    
  }

  //Display the original image
  namedWindow("Display Image");                
  imshow("Display Image", src1);  
  
  //Display the Low Pass Filtered Image image
  namedWindow("Low Pass Filtered Image");     
  imshow("Low Pass Filtered Image", src2);  
  imwrite("C:\\Users\\arjun\\Desktop\\opencv-slant-line.jpg",src2);
  waitKey(0);
  return 0;
}

Input:
OpenCV C++ Line Detection Input
Output:
OpenCV C++ Slant Line Detection Output

Wednesday, 6 April 2016

Opencv C++ Code For Detecting Lines Inclined at plus 45 degree

This OpenCV C++ Tutorial is about Slant Line Detection i.e. detecting lines inclined at plus 45 degrees
To detect slant lines inclined at +45 degress, we use the mask:
-1-12
-12-1
2-1-1

Thus sliding this mask over an Image we can detect Lines inclined at +45 degrees.
Here is the Opencv C++ Example of Slant Line (lines/edges at 45 degrees)Detection below:

//Opencv C++ Code for detecting line inclined at 45 degree
#include <opencv2/core/core.hpp>
#include <opencv2/highgui/highgui.hpp>
#include "iostream"
 
using namespace cv;
using namespace std;
 
int main( )
{
    Mat src1,src2;
 int a;
 Scalar intensity1=0;
    src1 = imread("C:\\Users\\arjun\\Desktop\\opencv-test.jpg", CV_LOAD_IMAGE_GRAYSCALE);
 src2 = src1.clone();

 //If image not found 
 if (!src1.data)                                                                          
     {  
      cout << "No image data \n";  
      return -1;  
     } 

  cout<<"Enter the mask Size =";
  cin>>a;

 //for loop for counting the number of rows and columns and displaying the pixel value at each point
   for (int i = 0; i < src1.rows-a; i++) { 
    for (int j = 0; j < src1.cols-a; j++) { 
   Scalar intensity2=0;
   for (int p = 0; p<a; p++) { 
     for (int q = 0; q<a; q++){ 
    intensity1 = src1.at<uchar>(i+p,j+q); 
    if( (p+q==(a-1)))
      {
    intensity2.val[0] +=(a-1)*intensity1.val[0];
      }
       else
      {
    intensity2.val[0] +=(-1)*intensity1.val[0];
      }
   
     }
  
  }
        src2.at<uchar>(i+(a-1)/2,j+(a-1)/2)=intensity2.val[0]/(a*a);
   } 
    
  }
 //Display the original image
 namedWindow("Display Image");                
 imshow("Display Image", src1); 

 //Display the Low Pass Filtered Image image
    namedWindow("Line Detection Image");     
 imshow("Line Detection Image", src2);  
    imwrite("C:\\Users\\arjun\\Desktop\\opencv-slant-line.jpg",src2);
 waitKey(0);
 return 0;
 }

Input:

OpenCV C++ Line Detection Input
Output:

OpenCV C++ Slant Line Detection Output

Monday, 4 April 2016

Opencv C++ Code For Vertical Line Detection

This OpenCV C++ Tutorial is about Vertical Line Detection i.e. How to Detect Vertical Edges or Lines in an Image
To detect Vertical Lines in an Image we use the mask:
-1-1-1
222
-1-1-1

Thus sliding this mask over an Image we can detect vertical Lines.
Note:- Sum of the Elements of the Mask is Zero
Here is the Opencv C++ Code with Example for Vertical Line/Edge Detection below:

//Opencv C++ Example for Detecting Vertical Lines
#include <opencv2/core/core.hpp>
#include <opencv2/highgui/highgui.hpp>
#include "iostream"
 
using namespace cv;
using namespace std;
 
int main( )
{
    Mat src1,src2;
 int a;
 Scalar intensity1=0;
    src1 = imread("C:\\Users\\arjun\\Desktop\\opencv-test.jpg", CV_LOAD_IMAGE_GRAYSCALE);
 //If image not found 
 if (!src1.data)                                                                          
     { cout << "No image data \n";  return -1; } 

 src2 = src1.clone();
 cout<<"Enter the mask Size(Preferably Enter Odd Number) =";
 cin>>a;

 //for loop for counting the number of rows and columns and displaying the pixel value at each point
   for (int i = 0; i < src1.rows-a; i++) { 
   for (int j = 0; j < src1.cols-a; j++) { 
  Scalar intensity2=0;
  for (int p = 0; p<a; p++) { 
  for (int q = 0; q<a; q++) { 
   intensity1 = src1.at<uchar>(i+p,j+q); 
   if( (q==(a-1)/2))
   {
    intensity2.val[0] +=(a-1)*intensity1.val[0];
   }
   else
   {
      intensity2.val[0] +=(-1)*intensity1.val[0];
   }
    } 
  }
    src2.at<uchar>(i+(a-1)/2,j+(a-1)/2)=intensity2.val[0]/(a*a);
 } 
    }
  //Display the original image
    namedWindow("Display Image");                
    imshow("Display Image", src1); 

   //Display the Low Pass Filtered Image image
    namedWindow("Low Pass Filtered Image");     
    imshow("Low Pass Filtered Image", src2);
    imwrite("C:\\Users\\arjun\\Desktop\\opencv-example-vertical-edges.png",src2);
    waitKey(0);
    return 0;
    }
Input :

OpenCV C++ Vertical Line Detection Input

Output:

OpenCV C++Vertical Line Detection Output


For Horizontal Line Detection Refer:
Opencv C++ Code : Detecting Horizontal Line in an Image.

Friday, 25 March 2016

Opencv C++ Code with Example for Object Detection using SURF Detector


This Opencv C++ Tutorial is about Object Detection and Recognition Using SURF.

For Feature Extraction and Detection Using SURF Refer:-
Opencv C++ Code with Example for Feature Extraction and Detection using SURF Detector

So, in the previous tutorial we learnt about  object recognition and how to detect and extract features from an object using SURF.
In this Opencv Article we are going to match those features of an object with the background image, thus performing object recognition. Here are few of the Syntaxes along with its description which are used for Objection Recognition Using SURF.

DescriptorExtractor:
It is an abstract base class for computing descriptors for image keypoints.


DescriptorExtractor::compute Computes the descriptors for a set of keypoints detected in an image (first variant) or image set (second variant).
Syntax:
C++: void DescriptorExtractor::compute(const Mat& image, vector<KeyPoint>& keypoints, Mat& descriptors)
C++: void DescriptorExtractor::compute(const vector<Mat>& images, vector<vector<KeyPoint>>& keypoints, vector<Mat>& descriptors)
Parameters:
image – Image.
images – Image set.
keypoints – Input collection of keypoints. Keypoints for which a descriptor cannot be computed are removed and the remaining ones may be reordered. Sometimes new keypoints can be added, for example: SIFT duplicates a keypoint with several dominant orientations (for each orientation).
descriptors – Computed descriptors. In the second variant of the method descriptors[i] are descriptors computed for a keypoints[i]. Row j is the keypoints (or keypoints[i]) is the descriptor for keypoint j-th keypoint.

DescriptorMatcher
It is an abstract base class for matching keypoint descriptors. It has two groups of match methods: for matching descriptors of an image with another image or with an image set.


DescriptorMatcher::match
It finds the best match for each descriptor from a query set.
C++: void DescriptorMatcher::match(const Mat& queryDescriptors, const Mat& trainDescriptors, vector<DMatch>& matches, const Mat& mask=Mat() )
C++: void DescriptorMatcher::match(const Mat& queryDescriptors, vector<DMatch>& matches, const vector<Mat>& masks=vector<Mat>() )
Parameters:
queryDescriptors – Query set of descriptors.
trainDescriptors – Train set of descriptors. This set is not added to the train descriptors collection stored in the class object.
matches – Matches. If a query descriptor is masked out in mask , no match is added for this descriptor. So, matches size may be smaller than the query descriptors count.
mask – Mask specifying permissible matches between an input query and train matrices of descriptors.
masks – Set of masks. Each masks[i] specifies permissible matches between the input query descriptors and stored train descriptors from the i-th image trainDescCollection[i].
Explaination:
In the first variant of this method, the train descriptors are passed as an input argument. In the second variant of the method, train descriptors collection that was set by DescriptorMatcher::add is used. Optional mask (or masks) can be passed to specify which query and training descriptors can be matched. Namely, queryDescriptors[i] can be matched with trainDescriptors[j] only if mask.at<uchar>(i,j) is non-zero.

DrawMatches
Draws the found matches of keypoints from two images.
Syntax:
C++: void drawMatches(const Mat& img1, const vector<KeyPoint>& keypoints1, const Mat& img2, const vector<KeyPoint>& keypoints2, const vector<DMatch>& matches1to2, Mat& outImg, const Scalar& matchColor=Scalar::all(-1), const Scalar& singlePointColor=Scalar::all(-1), const vector<char>& matchesMask=vector<char>(), int flags=DrawMatchesFlags::DEFAULT )
C++: void drawMatches(const Mat& img1, const vector<KeyPoint>& keypoints1, const Mat& img2, const vector<KeyPoint>& keypoints2, const vector<vector<DMatch>>& matches1to2, Mat& outImg, const Scalar& matchColor=Scalar::all(-1), const Scalar& singlePointColor=Scalar::all(-1), const vector<vector<char>>& matchesMask=vector<vector<char> >(), int flags=DrawMatchesFlags::DEFAULT )
Parameters:
img1 – First source image.
keypoints1 – Keypoints from the first source image.
img2 – Second source image.
keypoints2 – Keypoints from the second source image.
matches1to2 – Matches from the first image to the second one, which means that keypoints1[i] has a corresponding point in keypoints2[matches[i]] .
outImg – Output image. Its content depends on the flags value defining what is drawn in the output image. See possible flags bit values below.
matchColor – Color of matches (lines and connected keypoints). If matchColor==Scalar::all(-1) , the color is generated randomly.
singlePointColor – Color of single keypoints (circles), which means that keypoints do not have the matches. If singlePointColor==Scalar::all(-1) , the color is generated randomly.
matchesMask – Mask determining which matches are drawn. If the mask is empty, all matches are drawn. flags – Flags setting drawing features. Possible flags bit values are defined by DrawMatchesFlags.
Explaination:
This function draws matches of keypoints from two images in the output image. Match is a line connecting two keypoints (circles).

//OPENCV C++ Tutorial:Object Detection Using SURF detector
#include <iostream>
#include "opencv2/core/core.hpp"
#include "opencv2/highgui/highgui.hpp"
#include "opencv2/nonfree/nonfree.hpp"

using namespace cv;
using namespace std;

int main()
{
  //Load the Images
  Mat image_obj = imread( "C:\\Users\\arjun\\Desktop\\image_object.png", CV_LOAD_IMAGE_GRAYSCALE );
  Mat image_scene = imread( "C:\\Users\\arjun\\Desktop\\background_scene.png", CV_LOAD_IMAGE_GRAYSCALE );

  //Check whether images have been loaded
  if( !image_obj.data)
  { 
   cout<< " --(!) Error reading image1 " << endl; 
   return -1; 
  }
   if( !image_scene.data)
  { 
   cout<< " --(!) Error reading image2 " << endl; 
   return -1; 
  }


  //-- Step 1: Detect the keypoints using SURF Detector
  int minHessian = 400;
  SurfFeatureDetector detector( minHessian);
  vector<KeyPoint> keypoints_obj,keypoints_scene;
  detector.detect( image_obj, keypoints_obj );
  detector.detect( image_scene, keypoints_scene );

  //-- Step 2: Calculate descriptors (feature vectors)
  SurfDescriptorExtractor extractor;
  Mat descriptors_obj, descriptors_scene;
  extractor.compute( image_obj, keypoints_obj, descriptors_obj );
  extractor.compute( image_scene, keypoints_scene, descriptors_scene );

  //-- Step 3: Matching descriptor vectors using FLANN matcher
  FlannBasedMatcher matcher;
  std::vector< DMatch > matches;
  matcher.match( descriptors_obj, descriptors_scene, matches );

   Mat img_matches;
  drawMatches( image_obj, keypoints_obj, image_scene, keypoints_scene,
               matches, img_matches, Scalar::all(-1), Scalar::all(-1),
               vector<char>(), DrawMatchesFlags::NOT_DRAW_SINGLE_POINTS );
 
  //--Step3: Show detected (drawn) keypoints
  imshow("DetectedImage", img_matches );
  waitKey(0);

  return 0;
  }


Input Image:
OpenCV C++ Code SURF

Backround Image:
OpenCV C++ Code SURF Background Image

Output Image:
OpenCV C++ Code SURF Output Image

Now, we have marked the keypoints of the object which needs to be detected to that of the keypoints of the object in background image.
The next step is to mark the object in the scene with a rectangle.So that it would be easy for us to identify the object in the background image.
Here is the Opencv C++ code for it:
//OPENCV C++ Tutorial:Object Detection Using SURF detector
#include <iostream>
#include "opencv2/core/core.hpp"
#include "opencv2/highgui/highgui.hpp"
#include "opencv2/nonfree/nonfree.hpp"
#include "opencv2/calib3d/calib3d.hpp"

using namespace cv;
using namespace std;

int main()
{
  //Load the Images
  Mat image_obj = imread( "C:\\Users\\arjun\\Desktop\\image_object.png", CV_LOAD_IMAGE_GRAYSCALE );
  Mat image_scene = imread( "C:\\Users\\arjun\\Desktop\\background_scene.png", CV_LOAD_IMAGE_GRAYSCALE );

  //Check whether images have been loaded
  if( !image_obj.data)
  { 
   cout<< " --(!) Error reading image1 " << endl; 
   return -1; 
  }
   if( !image_scene.data)
  { 
   cout<< " --(!) Error reading image2 " << endl; 
   return -1; 
  }


  //-- Step 1: Detect the keypoints using SURF Detector
  int minHessian = 400;
  SurfFeatureDetector detector( minHessian);
  vector<KeyPoint> keypoints_obj,keypoints_scene;
  detector.detect( image_obj, keypoints_obj );
  detector.detect( image_scene, keypoints_scene );

  //-- Step 2: Calculate descriptors (feature vectors)
  SurfDescriptorExtractor extractor;
  Mat descriptors_obj, descriptors_scene;
  extractor.compute( image_obj, keypoints_obj, descriptors_obj );
  extractor.compute( image_scene, keypoints_scene, descriptors_scene );

  //-- Step 3: Matching descriptor vectors using FLANN matcher
  FlannBasedMatcher matcher;
  std::vector< DMatch > matches;
  matcher.match( descriptors_obj, descriptors_scene, matches );

   Mat img_matches;
  drawMatches( image_obj, keypoints_obj, image_scene, keypoints_scene,
               matches, img_matches, Scalar::all(-1), Scalar::all(-1),
               vector<char>(), DrawMatchesFlags::NOT_DRAW_SINGLE_POINTS );

   //-- Step 4: Localize the object
  vector<Point2f> obj;
  vector<Point2f> scene;

   for( int i = 0; i < matches.size(); i++ )
  {
     //-- Step 5: Get the keypoints from the  matches
    obj.push_back( keypoints_obj [matches[i].queryIdx ].pt );
    scene.push_back( keypoints_scene[ matches[i].trainIdx ].pt );
  }
 
   //-- Step 6:FindHomography
  Mat H = findHomography( obj, scene, CV_RANSAC );

   //-- Step 7: Get the corners of the object which needs to be detected.
  vector<Point2f> obj_corners(4);
  obj_corners[0] = cvPoint(0,0);
  obj_corners[1] = cvPoint( image_obj.cols, 0 );
  obj_corners[2] = cvPoint( image_obj.cols, image_obj.rows ); 
  obj_corners[3] = cvPoint( 0, image_obj.rows );

   //-- Step 8: Get the corners of the object form the scene(background image)
  std::vector<Point2f> scene_corners(4);

   //-- Step 9:Get the perspectiveTransform
  perspectiveTransform( obj_corners, scene_corners, H);

  //-- Step 10: Draw lines between the corners (the mapped object in the scene - image_2 )
  line( img_matches, scene_corners[0] + Point2f( image_obj.cols, 0), scene_corners[1] + Point2f( image_obj.cols, 0), Scalar(0, 255, 0), 4 );
  line( img_matches, scene_corners[1] + Point2f( image_obj.cols, 0), scene_corners[2] + Point2f( image_obj.cols, 0), Scalar( 0, 255, 0), 4 );
  line( img_matches, scene_corners[2] + Point2f( image_obj.cols, 0), scene_corners[3] + Point2f( image_obj.cols, 0), Scalar( 0, 255, 0), 4 );
  line( img_matches, scene_corners[3] + Point2f( image_obj.cols, 0), scene_corners[0] + Point2f( image_obj.cols, 0), Scalar( 0, 255, 0), 4 );

  //-- Step 11: Mark and Show detected image from the background 
  imshow("DetectedImage", img_matches );
  waitKey(0);

  return 0;
  }


Input Object Image:
OpenCV C++ Code SURF Input Image

Background Image:
OpenCV C++ Code SURF Background Image

Output Image:
OpenCV C++ Code SURF Output Image

Thursday, 24 March 2016

Opencv C++ Code with Example for Feature Extraction and Detection using SURF Detector

This OpenCV C++ Tutorial is about feature detection using SURF Detector.
Object Detection and Recognition has been of prime importance in Computer Vision.Thus many algorithms and techniques are being proposed to enable machines to detect and recognize objects.

So one of the easiest method what we can think of is storing whole of an image in a Matrix and comparing it with the background image.But storing whole of the image in the matrix an comparing it pixel by pixel is cumbersome, since the pixels values will change with the change in the lightening condition,rotation,size of the image etc.

So the most common  logic for all of these methods of object detection is feature recognition.Features are nothing but points of interest in an image.Thus we extract  and compare features with other images to search for the desired object/objects in the given image frame.
Now ,how should we determine these points of interest (features) in an image?What are its characteristics?

Characteristic of Features are:-
  • Geometric Invariance:Rotation,Scaling,Translation etc.
    • Scale Invariant i.e able to detect image at any scale irrespective of its distance from the webcam
    • Rotation Invariant i.e able to detect image rotated at any angle with respective to original image
    • Translation Invariant i.e Even if the image translates in the background, it should be able to detect it.Since on translation the background of an image may change.
  • Photometric Invariance(Brightness,Exposure) i.e irrespective of the lightening condition, it should be able to detect the desired image.

Now what is SURF?
SURF stands for Speeded Up Robust Features. It is an algorithm which extracts some unique keypoints and descriptors from an image.
In SURF,We use determinant of Hessian Matrix for feature detection.
Also, in SURF Laplacian of Gaussian (LOG) is approximated with Box Filter.Thus convolution with Box filters can be easily evaluated with the help of Integral Images.

Prerequisite Concepts:-
  • Laplacian of Gaussian
  • Box Filter
  • Scale Space
  • Integral Image
Advantages of Object detection using SURF
1. It is scale and rotation invariant.
2. Also,it doesn't require that long and tedious training, which is need in that of OpenCV Haar training.Also Haar is not rotation invariant.Thus,providing an edge over Haar Training.
3. It is several times faster than SIFT(Scale Invariant Feature Transform). Disadvantage:-
4. The detection process is little slow,as compared to that of Haar Training.Thus needing long time to detect the objects.

Here are few of the syntaxes used in the below code:-
FeatureDetector::detect
It detects keypoints in an image Syntax:
C++: void FeatureDetector::detect(const Mat& image, vector<KeyPoint>& keypoints, const Mat& mask=Mat() )
C++: void FeatureDetector::detect(const vector<Mat>& images, vector<vector<KeyPoint>>& keypoints, const vector<Mat>& masks=vector<Mat>() )
Parameters:
image – Image.
images – Image set.
keypoints – The detected keypoints. In the second variant of the method keypoints[i] is a set of keypoints detected in images[i] .
mask – Mask specifying where to look for keypoints (optional). It must be a 8-bit integer matrix with non-zero values in the region of interest.
masks – Masks for each input image specifying where to look for keypoints (optional). masks[i] is a mask for images[i].

SURF::SURF
The SURF extractor constructors.
Syntax:
C++: SURF::SURF()
C++: SURF::SURF(double hessianThreshold, int nOctaves=4, int nOctaveLayers=2, bool extended=true, bool upright=false )
Parameters:
  • hessianThreshold – Threshold for the keypoint detector. Only features, whose hessian is larger than hessianThreshold are retained by the detector. Therefore, the larger the value, the less keypoints you will get. A good default value could be from 300 to 500, depending from the image contrast.
  • nOctaves – The number of a gaussian pyramid octaves that the detector uses. It is set to 4 by default. If you want to get very large features, use the larger value. If you want just small features, decrease it.
  • nOctaveLayers – The number of images within each octave of a gaussian pyramid. It is set to 2 by default.
  • extended – 0 means that the basic descriptors (64 elements each) shall be computed
    1 means that the extended descriptors (128 elements each) shall be computed
  • upright – 0 means that detector computes orientation of each feature.
    1 means that the orientation is not computed (which is much, much faster). For example, if you match images from a stereo pair, or do image stitching, the matched features likely have very similar angles, and you can speed up feature extraction by setting upright=1..
Here is the OpenCV C++ Code with example to extract interest points with the help of SURF :
//OPENCV C++ Tutorial:Feature Detector Using SURF Detector
#include <iostream>
#include "opencv2/core/core.hpp"
#include "opencv2/highgui/highgui.hpp"
#include "opencv2/nonfree/nonfree.hpp"

using namespace cv;
using namespace std;

int main()
{
  Mat image1 = imread( "C:\\Users\\arjun\\Desktop\\opencv-logo.jpg", CV_LOAD_IMAGE_GRAYSCALE );
 
  if( !image1.data)
  { 
   cout<< " --(!) Error reading images " << endl; 
   return -1; 
  }

  //-- Step 1: Detect the keypoints using SURF Detector
  int minHessian = 400;
  SurfFeatureDetector detector( minHessian);
  std::vector<KeyPoint> keypoints_1;
  detector.detect( image1, keypoints_1 );
  
  //--Step2: Draw keypoints
  Mat img_keypoints_surf; 
  drawKeypoints( image1, keypoints_1, img_keypoints_surf, Scalar::all(-1), DrawMatchesFlags::DEFAULT );
 
  //--Step3: Show detected (drawn) keypoints
  imshow("Keypoints 1", img_keypoints_surf );
  waitKey(0);

  return 0;
  }


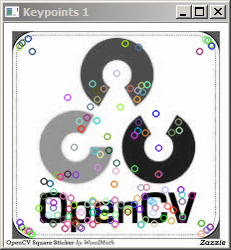
Input:
OpenCV-SURF-Input

Output:
OpenCV SURF Feature Extraction Output

Friday, 18 March 2016

OpenCV C++ Code for Real Time Face Detection Using Haar Cascade

In the Previous Tutorial we learnt about Haar Training and How to detect faces using Haar Cascade Classifier from images.
Refer:
Opencv C++ Tutorial of Face(object) Detection Using Haar Cascade
But in many of the real life application,we need to detect faces (objects) live either from video or from webcam.
Thus this Opencv C++ Tutorial is about doing real time face detection using Haar Cascade.
Note:-
The same code can be used for doing real time object detection by using its corresponding Haar Cacade XML file
Here is the Opencv C++ Example of face detection from a Webcam
//Opencv C++ Example on Real time Face Detection Using Haar Cascade Classifier
 
/*We can similarly train our own Haar Classifier and Detect any object which we want
Only Thing is we need to load our Classifier in place of cascade_frontalface_alt2.xml */
 
#include "opencv2/objdetect/objdetect.hpp"
#include "opencv2/highgui/highgui.hpp"
#include "opencv2/imgproc/imgproc.hpp"
  
#include <iostream>
#include <stdio.h>
  
using namespace std;
using namespace cv;
  
int main( )
{
 VideoCapture capture(0);  
    if (!capture.isOpened())  
    throw "Error when reading file";  
    namedWindow("window", 1);  
    for (;;)
     { 
       Mat image; 
       capture >> image;  
       if (image.empty())  
       break; 

       // Load Face cascade (.xml file)
       CascadeClassifier face_cascade;
       face_cascade.load( "D:\\opencv2410\\sources\\data\\haarcascades\\haarcascade_frontalface_alt.xml" );
       if(!face_cascade.load("D:\\opencv2410\\sources\\data\\haarcascades\\haarcascade_frontalface_alt.xml"))
       {
         cerr<<"Error Loading XML file"<<endl;
         return 0;
       }
 
      // Detect faces
      std::vector<Rect> faces;
      face_cascade.detectMultiScale( image, faces, 1.1, 2, 0|CV_HAAR_SCALE_IMAGE, Size(30, 30) );
  
      // Draw circles on the detected faces
      for( int i = 0; i < faces.size(); i++ )
      {
        Point center( faces[i].x + faces[i].width*0.5, faces[i].y + faces[i].height*0.5 );
        ellipse( image, center, Size( faces[i].width*0.5, faces[i].height*0.5), 0, 0, 360, Scalar( 255, 0, 255 ), 4, 8, 0 );
      }
      
  imshow( "Detected Face", image );
  waitKey(1);  
   }  
               
     return 0;
}

Note:- In the Previous code ,we are loading the Haar Cascade XML file again and again for every frame in the Video
We can ,initialize and load it before the start of Videocapture() function, thus improving the efficieny of our program considerably.
Refer the OpenCV C++ Code below:-
//Opencv C++ Example on Real Time Face Detection from a Video/Webcam Using Haar Cascade
 
/*We can similarly train our own Haar Classifier and Detect any object which we want
Only Thing is we need to load our Classifier in palce of cascade_frontalface_alt2.xml */
 
#include "opencv2/objdetect/objdetect.hpp"
#include "opencv2/highgui/highgui.hpp"
#include "opencv2/imgproc/imgproc.hpp"
  
#include <iostream>
#include <stdio.h>
  
using namespace std;
using namespace cv;
  
int main( )
{
   // Load Face cascade (.xml file)
       CascadeClassifier face_cascade;
       face_cascade.load( "D:\\opencv2410\\sources\\data\\haarcascades\\haarcascade_frontalface_alt.xml" );
       if(!face_cascade.load("D:\\opencv2410\\sources\\data\\haarcascades\\haarcascade_frontalface_alt.xml"))
       {
         cerr<<"Error Loading XML file"<<endl;
         return 0;
       }

 VideoCapture capture(0);  
    if (!capture.isOpened())  
    throw "Error when reading file";  
    namedWindow("window", 1);  
    for (;;)
     { 
       Mat image; 
       capture >> image;  
       if (image.empty())  
       break; 

      // Detect faces
      std::vector<Rect> faces;
      face_cascade.detectMultiScale( image, faces, 1.1, 2, 0|CV_HAAR_SCALE_IMAGE, Size(30, 30) );
  
      // Draw circles on the detected faces
      for( int i = 0; i < faces.size(); i++ )
      {
        Point center( faces[i].x + faces[i].width*0.5, faces[i].y + faces[i].height*0.5 );
        ellipse( image, center, Size( faces[i].width*0.5, faces[i].height*0.5), 0, 0, 360, Scalar( 255, 0, 255 ), 4, 8, 0 );
      }
      
  imshow( "Detected Face", image );
  waitKey(1);  
   }  
               
     return 0;
}
Note:
Haar is not Rotation Invariant.Thus if we rotate our Face a little,it wont be able to detect our faces.
Compare Below:
Face Detection Using Haar Cascade without Rotation
Face Detection Using Haar Cascade with Rotation

Saturday, 12 March 2016

Opencv C++ Tutorial of Face(object) Detection Using Haar Cascade


This OpenCV C++ Tutorial is about doing Face(object) Detection Using Haar Cascade.
The Steps of Doing Object Detection (Here it is face) using Haar Cascade are:-
  1. Load the Input Image.
  2. Load the Haar Cascade File (here it is haarcascade_frontalface_alt2.xml)
    Normally it is an XML file.
  3. Detect the Objects(here it is face) using detectMultiScale()
  4. Create ROI over the detected Objects(face).
    i.e. Draw a Rectangle or a Circle over the detected objects to mark them.
  5. Show the Output i.e. Marked Objects(faces)
Syntax:
C++: void CascadeClassifier::detectMultiScale(const Mat& image, vector& objects, double scaleFactor=1.1, int minNeighbors=3, int flags=0, Size minSize=Size(), Size maxSize=Size())
Parameters:

  • image – Matrix of the type CV_8U containing an image where objects are detected.
  • objects – Vector of rectangles where each rectangle contains the detected object.
  • scaleFactor – Parameter specifying how much the image size is reduced at each image scale.
  • minNeighbors – Parameter specifying how many neighbors each candidate rectangle should have to retain it.This parameter will affect the quality of the detected faces: higher value results in less detections but with higher quality.
  • flags – Parameter with the same meaning for an old cascade as in the function cvHaarDetectObjects. It is not used for a new cascade.
  • minSize – Minimum possible object size. Objects smaller than that are ignored.
  • maxSize – Maximum possible object size. Objects larger than that are ignored.
//Opencv C++ Example on Face Detection Using Haar Cascade
 
/*We can similarly train our own Haar Classifier and Detect any object which we want
Only Thing is we need to load our Classifier in palce of cascade_frontalface_alt2.xml */
 
#include "opencv2/objdetect/objdetect.hpp"
#include "opencv2/highgui/highgui.hpp"
#include "opencv2/imgproc/imgproc.hpp"
  
#include <iostream>
#include <stdio.h>
  
using namespace std;
using namespace cv;
  
int main( )
{
    Mat image;
    image = imread("C:\\Users\\arjun\\Desktop\\opencv-face-haarcascade-input.jpg", CV_LOAD_IMAGE_COLOR);  
    namedWindow( "window1", 1 );   imshow( "window1", image );
  
    // Load Face cascade (.xml file)
    CascadeClassifier face_cascade;
    face_cascade.load( "D:\\opencv2410\\sources\\data\\haarcascades\\haarcascade_frontalface_alt.xml" );

 if(face_cascade.empty())
// if(!face_cascade.load("D:\\opencv2410\\sources\\data\\haarcascades\\haarcascade_frontalface_alt.xml"))
 {
  cerr<<"Error Loading XML file"<<endl;
  return 0;
 }
 
    // Detect faces
    std::vector<Rect> faces;
    face_cascade.detectMultiScale( image, faces, 1.1, 2, 0|CV_HAAR_SCALE_IMAGE, Size(30, 30) );
  
    // Draw circles on the detected faces
    for( int i = 0; i < faces.size(); i++ )
    {
        Point center( faces[i].x + faces[i].width*0.5, faces[i].y + faces[i].height*0.5 );
        ellipse( image, center, Size( faces[i].width*0.5, faces[i].height*0.5), 0, 0, 360, Scalar( 255, 0, 255 ), 4, 8, 0 );
    }
      
    imshow( "Detected Face", image );
      
    waitKey(0);                   
    return 0;
}
Input:-
OpenCV C++ Haar Training

Output:-
OpenCV C++ Haar Training Face Detection

Thursday, 10 March 2016

Opencv C++ Tutorial for making your own Haar Classifier.

This Opencv C++ Article  is about how to make your own Haar Cascade Classifier.
Step1:
Create a Folder ImageSample.
In it Create two folders: opencv-positive-haar && NegativeFolder.
Prerequisites:
Set of Positive Images:
Images which need to be detected or in other words the actual objects.E.g. Face for Face detection,eyes for Eye detection,Pen for Pen Detection etc.
The more unique the Positive Images,the better our Classifier gets Trained.
  • For Training Classifier for face detection we need to collect a vast database of faces,where face belong to almost each age group,males and females,with and without mustaches and beards,with varied skin colour etc.
  • While when we need to train our classifier for one unique object, only one image can be enough.For e.g Image of a Company Logo,a Particular sign board etc.
Set of Negative Images:
Images other than the desired Images or in other words the one without object in it.
It should be minimum 3 times the no. of positive images for better object recognition and should include all the backgrounds where you want your object to get detected.

Note: Below mentioned method is for Creating Training Set from a Single Positive Image.
Creating Samples:
  1. Place the Positive Image in a separated folder.(Here it is opencv-positive-haar).
    • Navigate to that folder which contains positive images(folder name is opencv-positive-haar).
      Right Click on that folder(opencv-positive-haar) and Open Command Window Here.
    • Or Navigate to that folder in cmd

    Then,
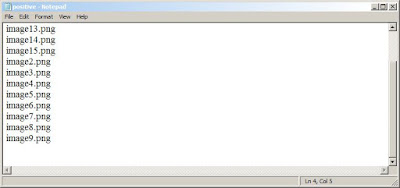
    Type : dir /b> positive.txt

Thus a positive.txt file will be created in the folder opencv-positive-haar.
Open that positive.txt file.

You will also find the name of the file positive.txt in it.
Delete it.
So,after deletion, the positive.txt file would only contain the names of the image.

Similarly,For Negative Images make a separate folder which will contain the negative images.
Make negative.txt file by typing: dir /b> negative.txt (Only after Navigating to that Folder)
Then,
  1. Open the text  file negative.txt.
  2. Delete the file name "negative.txt" from it, so that it only contains the name of negative images

opencv_createsamples:
A large dataset of positive images is created by applying perspective transform (rotating the images at various angle and changing the intensity of light).
The amount of randmoness can be controlled by varing the command line arguments of opencv_createsamples.


Command line arguments:


-vec
Name of the output file containing the positive samples for training.


-img
Source object image (e.g., a company logo,a text file describng the path of postive images etc).


-bg
Background description file; contains a list of images which are used as a background for randomly distorted versions of the object.


-num
Number of positive samples to generate.


-bgcolor -bgthresh
Background color (currently grayscale images are assumed); the background color denotes the transparent color. Since there might be compression artifacts, the amount of color tolerance can be specified by -bgthresh. All pixels withing bgcolor-bgthresh and bgcolor+bgthresh range are interpreted as transparent.


-inv
If specified, colors will be inverted.


-randinv
If specified, colors will be inverted randomly.


-maxidev
Maximal intensity deviation of pixels in foreground samples.


-maxxangle
-maxyangle
-maxzangle
Maximum rotation angles must be given in radians.


-show
Useful debugging option. If specified, each sample will be shown. Pressing Esc will continue the samples creation process without.


-w
Width (in pixels) of the output samples.


-h
Height (in pixels) of the output samples.


-pngoutput
With this option switched on opencv_createsamples tool generates a collection of PNG samples and a number of associated annotation files, instead of a single vec file.


Method 1
Navigate to the location where OpenCV is installed .
(In my PC the path is:D:\opencv2410\build\x86\vc10\bin.) 
And check in the bin\ folder if the .exe files (opencv_createsamples.exe, opencv_traincascade.exe , opencv_haartraining.exe )are present or not.

Copy all these .exe (opencv_createsamples.exe , opencv_traincascade.exe) in ImageSample folder.

To show the parameters that can be used for creating the samples type: cd opencv_createsamples.(i.e cd  filename_for_creating_samples only after navigating to that folder through cmd).

i.e. "Right Click" That folder(ImageSample) while pressing "Shift Key"
      Click Open Command Window here.

Method 2:
1. Open the cmd. 2. Type cd /d (path_of_opencv_createsamples) (without curly bracket as shown in fig)


The next step is to create a positive .vec file
  1. Open Notepad
  2. Type the following command for a Single Image called my_image_name.jpg:
  3. C:\Users\arjun\Desktop\ImageSample\opencv_createsamples.exe -img \opencv-positive-haar\img my_image_name.jpg -vec samples.vec -num 250 -w 30 -h 30 PAUSE
    Note:Though we have taken one positive image we are specifying -num 250.Because it will do perspective transformation and generate 250 positive images.
  4. And save it with .bat extension.
  5. Now double click the .bat file created.

Note:
C:\Users\arjun\Desktop\ImageSample\opencv_createsamples.exe : It is the File path So you need to give that path which is there in your PC.
Followed by -info negative.txt -vec samples.vec -num 250 -w 30 -h 30 PAUSE
where: negative.txt is the text file which contains path of negative samples
samples.vec: It is the name of the .vec file
num: refers to the number of positive image which we need to be generated in vec file.
w and h specifies the with and height.(If it is more the better the detection.So if possible take it 500)

To view the samples in the .vec file again create a .bat file with the code:
C:\Users\arjun\Desktop\ImageSample\opencv_createsamples.exe -vec samples.vec -w 30 -h 30 -show
i.e.
file_path -vec name_of_vecfile -w width -h height -show

Training the Classifier:
Navigate to the folder ImageSample.
Locate opencv_traincascade.exe


You can find the command line arguemnts of opencv_traincascade.exe

Common arguments:

-data 
Where the trained classifier should be stored.


-vec
vec-file with positive samples (created by opencv_createsamples utility).


-bg
Background description file.


-numPos
-numNeg
Number of positive/negative samples used in training for every classifier stage.


-numStages
Number of cascade stages to be trained.


-precalcValBufSize
Size of buffer for precalculated feature values (in Mb).


-precalcIdxBufSize
Size of buffer for precalculated feature indices (in Mb). The more memory you have the faster the training process.


-baseFormatSave
This argument is actual in case of Haar-like features. If it is specified, the cascade will be saved in the old format.


-acceptanceRatioBreakValue
This argument is used to determine how precise your model should keep learning and when to stop. A good guideline is to train not further than 10e-5, to ensure the model does not overtrain on your training data. By default this value is set to -1 to disable this feature.


Cascade parameters:

-stageType
Type of stages. Only boosted classifier are supported as a stage type at the moment.


-featureType<{HAAR(default), LBP}>
Type of features: HAAR - Haar-like features, LBP - local binary patterns.


-w
-h
Size of training samples (in pixels). Must have exactly the same values as used during training samples creation (opencv_createsamples utility).


Boosted classifer parameters:

-bt <{DAB, RAB, LB, GAB(default)}>
Type of boosted classifiers: DAB - Discrete AdaBoost, RAB - Real AdaBoost, LB - LogitBoost, GAB - Gentle AdaBoost.


-minHitRate
Minimal desired hit rate for each stage of the classifier. Overall hit rate may be estimated as (min_hit_rate^number_of_stages).


-maxFalseAlarmRate
Maximal desired false alarm rate for each stage of the classifier. Overall false alarm rate may be estimated as (max_false_alarm_rate^number_of_stages).


-weightTrimRate
Specifies whether trimming should be used and its weight. A decent choice is 0.95.


-maxDepth
Maximal depth of a weak tree. A decent choice is 1, that is case of stumps.


-maxWeakCount
Maximal count of weak trees for every cascade stage. The boosted classifier (stage) will have so many weak trees (<=maxWeakCount), as needed to achieve the given -maxFalseAlarmRate.


Haar-like feature parameters:

-mode
Selects the type of Haar features set used in training. BASIC use only upright features, while ALL uses the full set of upright and 45 degree rotated feature set. See [Rainer2002] for more details.


Local Binary Patterns parameters:
Local Binary Patterns don’t have parameters.


Now,
First Create a Folder Classifier in ImageSample.
Thus its directory structure would be ImageSample/Classifier.

Create a .bat file with the following command:
C:\Users\arjun\Desktop\ImageSample\opencv_traincascade.exe -data classifier -vec samples.vec -bg NegativeFolder\negative.txt -numStages 20 -minHitRate 0.999 -maxFalseAlarmRate 0.5 -numPos 250 -numNeg 400 -w 30 -h 30 -mode ALL -precalcValBufSize 2048 -precalcldxBufSize 2048
Double Click the .bat file.

Note:

      C:\Users\arjun\Desktop\ImageSample\opencv_traincascase.exe : Is the path of the file.
      samples.vec: Is the name of the .vec file
      negative.txt: It is the text file which contains the path of all the negative images.
Thus we have successfully generated the haarcascade file with .xml extension in Classifier Folder..