Showing posts with label OpenCV. Show all posts

Sunday, 10 April 2016

OpenCV C++ Code for putting Text on an Image

This Opencv C++ Tutorial is about putting Text on an Image

In Opencv we can put Text on an Image by using putText() function.
Syntax:
C++: void putText(Mat& img, const string& text, Point org, int fontFace, double fontScale, Scalar color, int thickness=1, int lineType=8, bool bottomLeftOrigin=false )
Parameters:
img – Image.
text – Text string to be drawn.
org – Bottom-left corner of the text string in the image.
font – CvFont structure initialized using InitFont().
fontFace – Font type. One of FONT_HERSHEY_SIMPLEX, FONT_HERSHEY_PLAIN, FONT_HERSHEY_DUPLEX, FONT_HERSHEY_COMPLEX, FONT_HERSHEY_TRIPLEX, FONT_HERSHEY_COMPLEX_SMALL, FONT_HERSHEY_SCRIPT_SIMPLEX, or FONT_HERSHEY_SCRIPT_COMPLEX, where each of the font ID’s can be combined with FONT_ITALIC to get the slanted letters.
fontScale – Font scale factor that is multiplied by the font-specific base size.
color – Text color.
thickness – Thickness of the lines used to draw a text.
lineType – Line type. See the line for details.
bottomLeftOrigin – When true, the image data origin is at the bottom-left corner. Otherwise, it is at the top-left corner.

//Opencv c++ code for Overlaying a Text on an Image
//Opencv c++ code for Putting Text on an Image
#include <opencv2/core/core.hpp>
#include <opencv2/highgui/highgui.hpp>
#include <iostream>

using namespace cv;
using namespace std;

int main()
{
 Mat image;
 image=imread("C:\\Users\\arjun\\Desktop\\opencv-logo.png",1);

 if(!image.data)
 { printf("Error loading image \n"); return -1;}

    putText(image, "opencv-hub", Point(5,100), FONT_HERSHEY_DUPLEX, 1, Scalar(0,143,143), 2);

 namedWindow("Image Window image",CV_WINDOW_AUTOSIZE);
 imshow("Image Window image",image);

 waitKey(0);
 return(0);
}


Input Image:-
OpenCV-logo

Output Image:-
OpenCV C++ Code putText

Note:-Here we have put the text "opencv"  (seen in purple color) over the image.

Thursday, 24 March 2016

Opencv C++ Code with Example for Feature Extraction and Detection using SURF Detector

This OpenCV C++ Tutorial is about feature detection using SURF Detector.
Object Detection and Recognition has been of prime importance in Computer Vision.Thus many algorithms and techniques are being proposed to enable machines to detect and recognize objects.

So one of the easiest method what we can think of is storing whole of an image in a Matrix and comparing it with the background image.But storing whole of the image in the matrix an comparing it pixel by pixel is cumbersome, since the pixels values will change with the change in the lightening condition,rotation,size of the image etc.

So the most common  logic for all of these methods of object detection is feature recognition.Features are nothing but points of interest in an image.Thus we extract  and compare features with other images to search for the desired object/objects in the given image frame.
Now ,how should we determine these points of interest (features) in an image?What are its characteristics?

Characteristic of Features are:-
  • Geometric Invariance:Rotation,Scaling,Translation etc.
    • Scale Invariant i.e able to detect image at any scale irrespective of its distance from the webcam
    • Rotation Invariant i.e able to detect image rotated at any angle with respective to original image
    • Translation Invariant i.e Even if the image translates in the background, it should be able to detect it.Since on translation the background of an image may change.
  • Photometric Invariance(Brightness,Exposure) i.e irrespective of the lightening condition, it should be able to detect the desired image.

Now what is SURF?
SURF stands for Speeded Up Robust Features. It is an algorithm which extracts some unique keypoints and descriptors from an image.
In SURF,We use determinant of Hessian Matrix for feature detection.
Also, in SURF Laplacian of Gaussian (LOG) is approximated with Box Filter.Thus convolution with Box filters can be easily evaluated with the help of Integral Images.

Prerequisite Concepts:-
  • Laplacian of Gaussian
  • Box Filter
  • Scale Space
  • Integral Image
Advantages of Object detection using SURF
1. It is scale and rotation invariant.
2. Also,it doesn't require that long and tedious training, which is need in that of OpenCV Haar training.Also Haar is not rotation invariant.Thus,providing an edge over Haar Training.
3. It is several times faster than SIFT(Scale Invariant Feature Transform). Disadvantage:-
4. The detection process is little slow,as compared to that of Haar Training.Thus needing long time to detect the objects.

Here are few of the syntaxes used in the below code:-
FeatureDetector::detect
It detects keypoints in an image Syntax:
C++: void FeatureDetector::detect(const Mat& image, vector<KeyPoint>& keypoints, const Mat& mask=Mat() )
C++: void FeatureDetector::detect(const vector<Mat>& images, vector<vector<KeyPoint>>& keypoints, const vector<Mat>& masks=vector<Mat>() )
Parameters:
image – Image.
images – Image set.
keypoints – The detected keypoints. In the second variant of the method keypoints[i] is a set of keypoints detected in images[i] .
mask – Mask specifying where to look for keypoints (optional). It must be a 8-bit integer matrix with non-zero values in the region of interest.
masks – Masks for each input image specifying where to look for keypoints (optional). masks[i] is a mask for images[i].

SURF::SURF
The SURF extractor constructors.
Syntax:
C++: SURF::SURF()
C++: SURF::SURF(double hessianThreshold, int nOctaves=4, int nOctaveLayers=2, bool extended=true, bool upright=false )
Parameters:
  • hessianThreshold – Threshold for the keypoint detector. Only features, whose hessian is larger than hessianThreshold are retained by the detector. Therefore, the larger the value, the less keypoints you will get. A good default value could be from 300 to 500, depending from the image contrast.
  • nOctaves – The number of a gaussian pyramid octaves that the detector uses. It is set to 4 by default. If you want to get very large features, use the larger value. If you want just small features, decrease it.
  • nOctaveLayers – The number of images within each octave of a gaussian pyramid. It is set to 2 by default.
  • extended – 0 means that the basic descriptors (64 elements each) shall be computed
    1 means that the extended descriptors (128 elements each) shall be computed
  • upright – 0 means that detector computes orientation of each feature.
    1 means that the orientation is not computed (which is much, much faster). For example, if you match images from a stereo pair, or do image stitching, the matched features likely have very similar angles, and you can speed up feature extraction by setting upright=1..
Here is the OpenCV C++ Code with example to extract interest points with the help of SURF :
//OPENCV C++ Tutorial:Feature Detector Using SURF Detector
#include <iostream>
#include "opencv2/core/core.hpp"
#include "opencv2/highgui/highgui.hpp"
#include "opencv2/nonfree/nonfree.hpp"

using namespace cv;
using namespace std;

int main()
{
  Mat image1 = imread( "C:\\Users\\arjun\\Desktop\\opencv-logo.jpg", CV_LOAD_IMAGE_GRAYSCALE );
 
  if( !image1.data)
  { 
   cout<< " --(!) Error reading images " << endl; 
   return -1; 
  }

  //-- Step 1: Detect the keypoints using SURF Detector
  int minHessian = 400;
  SurfFeatureDetector detector( minHessian);
  std::vector<KeyPoint> keypoints_1;
  detector.detect( image1, keypoints_1 );
  
  //--Step2: Draw keypoints
  Mat img_keypoints_surf; 
  drawKeypoints( image1, keypoints_1, img_keypoints_surf, Scalar::all(-1), DrawMatchesFlags::DEFAULT );
 
  //--Step3: Show detected (drawn) keypoints
  imshow("Keypoints 1", img_keypoints_surf );
  waitKey(0);

  return 0;
  }


Input:
OpenCV-SURF-Input

Output:
OpenCV SURF Feature Extraction Output

Thursday, 17 December 2015

Scanning Barcodes / QR Codes with OpenCV using ZBar

This Opencv Tutorial is about Scanning or Reading Barcode with Opencv by using ZBar Libraries

A bar code can best be described as an "optical Morse code." Or in other words it could be said as the machine readable representation of the human-readable characters. The mapping between messages and barcodes is called a symbology.

Links where we could create barcodes:
Bar-codes can be subdivided into two types, 1-Dimensional and 2-Dimensional .

1-Dimensional (1D)bar codes
It comprises of parallel lines(bars) of varying widths(thickness) and spaces used to encode information about the object it labels. The various types of 1-Dimensional bar codes are:
  • UPC Code(Universal Product Code)
  • Variations:UPC-A and UPC-E 
    1 UPC-A:It uses 12 digits codes and no other digits other than the numbers
    2. UPC-E:It uses only 6 digit codes and other digits other than the numbers
  •  EAN Code(European Article Number now renamed as International Article Number)
  • Variations: EAN-13, EAN-8, JAN-13, ISBN, ISSN
    EAN-13 barcode: It is similar to UPC-A barcode with the only visual difference lying in the position of the last digit.In EAN-13 barcode system the checksum digits lies below the barcode rather than to the right to it.EAN-13 barcode system consists of 2 groups of 6 digits each. 
    EAN-8 barcode: It is simliar to that of EAN-13 barcode system except the fact that it was introduced for the small packages where EAN-13 barcode system is not that useful.
  • Code 39:
  • Also known as code 3 of 9, initial version could encode only 39 characters,now could encode upto 43 characters.A to Z,0 to 9, and some special symbols like "$" , "/" , "," , "%" and space.Each character is encoded with five bars and four spaces.
  • Code 128:
  • It can encode all 128 ASCII characters.
  • ITF-14:
  • Also known as "Interleaved 2 of 5" is a high density bar-code symbology used for encoding only numeric digits from  0 to 9.It always codes digit pairs for e.g 01 is regarded as one pair and coded by 1 set of bars similarly for 02 and so on.Thus it should always consist of even number of digits.Whenever the data to be encoded is of odd numbers a leading 0 is added to data.
  • Codabar
  • Variations: Codeabar, Ames Code, NW-7, Monarch, Code 2 of 7, Rationalized Codabar, ANSI/AIM BC3-1995, USD-4
    It is a self checking bar-code symbology which can encode 16 different characters (consists of numbers from 0 to 9 , "$" ,"+" , "-" , ":" , ".","/" and an additional 4 start or stop characters (A,B,C,D).
  • GS1 Databar
  • Variations: GS1 DataBar Omnidirectional, Truncated, Stacked, Stacked Omnidirectional, Expanded, Expanded Stacked.
  • MSI Plessey: Also known as modified Plessey is not slf checking symbology and can encode only digits from 0 to 9.
2-Dimensional (2D) Barcode:
The  2D bar codes are similar to 1-D except  the fact that it can store more data per unit area(since it can not only store images horizontally as 1-D barcodes do but also vertically)
  • QR code:
  • DATAMATRIX Code:
  • PDF 417:
  • AZTEC:
Now,

How to scan/read these Barcodes using OPENCV?

Scanning the barcdoes with Zbar libraries are quite simple. So, What is ZBar and how to use ZBAR with OPENCV? ZBar is an open source library for reading bar codes from various sources, such as video streams, image files and raw intensity sensors. It supports many popular symbologies (types of bar codes) including EAN-13/UPC-A, UPC-E, EAN-8, Code 128, Code 39, Interleaved 2 of 5 and QR Code.So to read these barcodes we use ZBar along with OPENCV. The Steps to configure ZBar with OPENCV is as mentioned below:

1. Install Z-bar(Windows installer) from the link below:
http://sourceforge.net/projects/zbar/files/zbar/0.10/zbar-0.10-setup.exe/download
 zbar-installation-link


2. Now Open your Visual Studio : Go to File >> New>>Project.
 i. In Installed Templates Select Visual C++  
ii. Win32 Console Application
iii. Name of Project as BarcodeScanner.


Click on Next
In Additional Options : Tick Empty Project 
Finish

3. Right Click on File BarcodeScanner in Solution Explorer.

Click on Properties: The Property Pages Dialog Box would pop-up.

In "Configuration Properties" goto "VC++ Directories" then to "Include Directories"

Double click the empty box
4. Browse and Add the Path of OpenCV Include folder and ZBar Include folder

Here it is==> D:\opencv2410\build\include


Here it is ==> D:\opencv2410\build\include
Click OK and then  Apply.

5. Goto Library Directories.Add the path of the ZBar lib folder.

Here it is==> C:\Program Files\ZBar\lib

6. Goto Linker ==> Input
Then to Additional Dependencies
Add:
libzbar-0.lib
opencv_calib3d2410d.lib
opencv_contrib2410d.lib
opencv_core2410d.lib
opencv_features2d2410d.lib
opencv_flann2410d.lib
opencv_gpu2410d.lib
opencv_highgui2410d.lib
opencv_imgproc2410d.lib
opencv_legacy2410d.lib
opencv_ml2410d.lib
opencv_nonfree2410d.lib
opencv_objdetect2410d.lib
opencv_photo2410d.lib
opencv_stitching2410d.lib
opencv_superres2410d.lib
opencv_ts2410d.lib
opencv_video2410d.lib
opencv_videostab2410d.lib

Click OK

Click OK and APPLY on Property Page Dialog Box
(Note: If it doesn't work also copy all the library files under the debug folder of the current project)

7. Right Click Source Files in BarcodeScanner, goto Add , goto New Item.

Goto Visual C++ , Select C++ File(.cpp).Name it as "main" (without double inverted commas)


8. Copy the Opencv Code for Barcode Scanning as shown below:
// OpenCV Barcode Scanner  Tutorial 
// Opencv   Barcode Reader Tutorial
#include <opencv2/core/core.hpp> 
#include <opencv2/highgui/highgui.hpp> 
#include "opencv2/opencv.hpp"  
#include <iostream>
 #include "zbar.h"  
using namespace cv;
using namespace std;
 using namespace zbar;  

 int main(void){  
      ImageScanner scanner;  
      scanner.set_config(ZBAR_NONE, ZBAR_CFG_ENABLE, 1);  
       // obtain image data  
      char file[256];  
      cin>>file;  
      Mat img = imread(file,0);  
      Mat imgout;  
      cvtColor(img,imgout,CV_GRAY2RGB);  
      int width = img.cols;  
      int height = img.rows;  
   uchar *raw = (uchar *)img.data;  
   // wrap image data  
   Image image(width, height, "Y800", raw, width * height);  
   // scan the image for barcodes  
   int n = scanner.scan(image);  
   // extract results  
   for(Image::SymbolIterator symbol = image.symbol_begin();  
     symbol != image.symbol_end();  
     ++symbol) {  
                vector<Point> vp;  
     // do something useful with results  
     cout << "decoded " << symbol->get_type_name()  
        << " symbol \"" << symbol->get_data() << '"' <<" "<< endl;  
           int n = symbol->get_location_size();  
           for(int i=0;i<n;i++){  
                vp.push_back(Point(symbol->get_location_x(i),symbol->get_location_y(i))); 
           }  
           RotatedRect r = minAreaRect(vp);  
           Point2f pts[4];  
           r.points(pts);  
           for(int i=0;i<4;i++){  
                line(imgout,pts[i],pts[(i+1)%4],Scalar(255,0,0),3);  
           }  
           cout<<"Angle: "<<r.angle<<endl;  
   }  
      imshow("imgout.jpg",imgout);  
   // clean up  
   image.set_data(NULL, 0);  
       waitKey();  
 }  

Sunday, 15 November 2015

Difference between copyTo,clone and assignment operator in OpenCV

Since  we have to deal with image of larger sizes, loading the images over and over again would decrease the computational efficiency of the program.
Thus we make use of the concept called image headers.

The basic idea is that each Mat object would have their unique headers but the matrix can be shared between the two instance by having the matrix pointers point to the same memory location.
Thus copy operator would only copy header but not the actual matrix data,thus saving the computational time.

Mat A, C;                                 // creates just the header parts
A = imread(argv[1], CV_LOAD_IMAGE_COLOR); // here we'll know the method used (allocate matrix)

Mat B(A);                                 // Use the copy constructor

C = A;                                    // Assignment operator

The interesting part here is that  Mat objects B and C just copy the Matrix headers and not the actual matrix data.Thus changing any of the matrix would reflect the change on the other.

// OpenCV copy constructor and assignment operator 
#include <opencv2/core/core.hpp> 
#include <opencv2/highgui/highgui.hpp> 
#include <iostream>

using namespace cv;
using namespace std;

int main()
{
 Mat B,A;
 A = Mat::ones(2, 5, CV_8UC1);
 B = A;
 Mat C(A);
 cout<<"MAT A: \n"<<A<<"\n \n";
 cout<<"MAT B: \n"<<B<<"\n \n";
 cout<<"MAT C: \n"<<C<<"\n \n";
 return 0;
}
Output:
MAT A:
[1, 1, 1, 1, 1;
1, 1, 1, 1, 1]

MAT B:
[1, 1, 1, 1, 1;
 1, 1, 1, 1, 1]

MAT C:
[1, 1, 1, 1, 1;
1, 1, 1, 1, 1]


See the output of the below code:
// OpenCV copy constructor and assignment operator  
#include <opencv2/core/core.hpp> 
#include <opencv2/highgui/highgui.hpp> 
#include <iostream>

using namespace cv;
using namespace std;

int main()
{
 Mat B,A;
 A = Mat::ones(2, 5, CV_8UC1);
 B = A;
 Mat C(A);
 B=B*5;
 cout<<"MAT A: \n"<<A<<"\n \n";
 cout<<"MAT B: \n"<<B<<"\n \n";
 cout<<"MAT C: \n"<<C<<"\n \n";
 return 0;
}
Output:
MAT A:
[5, 5, 5, 5, 5;
 5, 5, 5, 5, 5]

MAT B:
[5, 5, 5, 5, 5;
 5, 5, 5, 5, 5]

MAT C:
[5, 5, 5, 5, 5;
 5, 5, 5, 5, 5]
Note:Matrix A and C also gets changed due to change in Matrix B.

copyTo and clone:

Mat A = B.clone();
Mat C;
B.copyTo(C);

Here by changing the matrix data of Mat objects B and C wont reflect the change to that on the other matrix.For e.g if we are changing the matrix values of A then B and C would no longer be affected by that of the corresponding change in A because the copyTo and clone operator copies the actual data of the matrix not just its headers
To copy the underlying matrix of an image we use copyTo and clone operator.

Analyse the output of the below code:

// OpenCV copyTO,clone Tutorial 
#include <opencv2/core/core.hpp> 
#include <opencv2/highgui/highgui.hpp> 
#include <iostream>

using namespace cv;
using namespace std;

int main()
{
Mat A = Mat::ones(2, 5, CV_8UC1);
Mat B=A.clone();
Mat C;
A.copyTo(C);
 cout<<"MAT A: \n"<<A<<"\n \n";
 cout<<"MAT B: \n"<<B<<"\n \n";
 cout<<"MAT C: \n"<<C<<"\n \n";
 return 0;
}

Output:
MAT A:
[1, 1, 1, 1, 1;
 1, 1, 1, 1, 1]

MAT B:
[1, 1, 1, 1, 1;
 1, 1, 1, 1, 1]

MAT C:
[1, 1, 1, 1, 1;
 1, 1, 1, 1, 1]

// OpenCV copyTO,clone Tutorial 
#include <opencv2/core/core.hpp> 
#include <opencv2/highgui/highgui.hpp> 
#include <iostream>

using namespace cv;
using namespace std;

int main()
{
Mat A = Mat::ones(2, 5, CV_8UC1);
Mat G = Mat::eye(2, 5, CV_8UC1);
Mat B=A.clone();
B=B*5;
Mat C;
G.copyTo(C);
G=G*6;
 cout<<"MAT A: \n"<<A<<"\n \n";
 cout<<"MAT B: \n"<<B<<"\n \n";
 cout<<"MAT C: \n"<<C<<"\n \n";
 cout<<"MAT G: \n"<<G<<"\n \n";
 return 0;
}

Output:
MAT A:
[1, 1, 1, 1, 1;
 1, 1, 1, 1, 1]

MAT B:
[5, 5, 5, 5, 5;
 5, 5, 5, 5, 5]

MAT C:
[1, 0, 0, 0, 0;
 0, 1, 0, 0, 0]

MAT G:
[6, 0, 0, 0, 0;
 0, 6, 0, 0, 0]

Difference between clone() and copyTo():
Analyse the output of the two codes.

copyTo:
// OpenCV copyTo Tutorial 
#include <opencv2/core/core.hpp> 
#include <opencv2/highgui/highgui.hpp> 
#include <iostream>

using namespace cv;
using namespace std;

int main()
{
Mat A = Mat::ones(2, 5, CV_8UC1);
cout<<"MAT A before clone opeation: \n"<<A<<"\n \n";
Mat B = A;
Mat C = Mat::eye(2, 5, CV_8UC1);
A=C.clone();
 cout<<"MAT A: \n"<<A<<"\n \n";
 cout<<"MAT B: \n"<<B<<"\n \n";
 cout<<"MAT C: \n"<<C<<"\n \n";
 return 0;
}

Output:
MAT A before clone opeation:
[1, 1, 1, 1, 1;
 1, 1, 1, 1, 1]

MAT A:
[1, 0, 0, 0, 0;
 0, 1, 0, 0, 0]

MAT B:
[1, 1, 1, 1, 1;
 1, 1, 1, 1, 1]

MAT C:
[1, 0, 0, 0, 0;
 0, 1, 0, 0, 0]

clone():
// OpenCV clone Tutorial 
#include <opencv2/core/core.hpp> 
#include <opencv2/highgui/highgui.hpp> 
#include <iostream>

using namespace cv;
using namespace std;

int main()
{
Mat A = Mat::ones(2, 5, CV_8UC1);
cout<<"MAT A before copyTo operation: \n"<<A<<"\n \n";
Mat B = A;
Mat C = Mat::eye(2, 5, CV_8UC1);
C.copyTo(A);
 cout<<"MAT A: \n"<<A<<"\n \n";
 cout<<"MAT B: \n"<<B<<"\n \n";
 cout<<"MAT C: \n"<<C<<"\n \n";
 return 0;
}
Output:
MAT A before copyTo operation:
[1, 1, 1, 1, 1;
 1, 1, 1, 1, 1]

MAT A:
[1, 0, 0, 0, 0;
 0, 1, 0, 0, 0]

MAT B:
[1, 0, 0, 0, 0;
 0, 1, 0, 0, 0]

MAT C:
[1, 0, 0, 0, 0;
 0, 1, 0, 0, 0]

Thus by comparing the output of copyTo() and clone() we see that when the destination matrix and the source matrix have the same type and size, copyTo will not change the address of the destination matrix, while clone will always allocate a new address for the destination matrix.

Monday, 8 June 2015

Accessing pixel value of an image using vec3b function

We want to obtain the pixel value of an image:

Let us consider a 3 channel image of BGR color ordering
(The BGR color ordering is the default order returned  by imread)
Here the order of the channel is reverse

(We generally use RGB color model while describing about an image.In BGR the color model is same except the order of the channel is reverse)

1. The code for reading value of the pixel at the co-ordinates(x,y)
Vec3b imagepixel = image.at(x,y);
/*Reading the pixel value of an image at a particular location*/
#include <opencv2/core/core.hpp>  
#include <opencv2/highgui/highgui.hpp>  
#include <iostream> 

  using namespace std;  
  using namespace cv;  

int main() 
  {  
    Mat image; 
 //Reading the color image 
    image = imread("C:\\Users\\arjun\\Desktop\\image003.png", CV_LOAD_IMAGE_COLOR);  

  if (!image.data)             //If image not found                                                             
     {  
      cout << "No image data \n";  
      return -1;  
     } 
       Vec3b imagepixel = image.at<Vec3b>(250,500); //Reading pixel value at location (i,j)
    cout<<"imagepixel(BGR)="<<imagepixel<<"\n" ; //Displaying the pixel value  
       
        namedWindow("Display Image");               //Display the original image
  imshow("Display Image", image);  
  waitKey(0);
  return 0;
      }

Here is the link of the code for accessing the value of the image at a point:

_____________________________________________________
Output:

output-accessing-pixel-value-at-coordinate

______________________________________________________
Image:

original-image-opencv

_____________________________________________________

2. Code for dynamically entering the co-ordinates of the image by the user:


/*Reading the pixel value of an image at a particular location*/


#include <opencv2/core/core.hpp>  
#include <opencv2/highgui/highgui.hpp>  
#include <iostream> 

  using namespace std;  
  using namespace cv;  

int main() 
  {  
    Mat image; 
 //Reading the color image 
    image = imread("C:\\Users\\arjun\\Desktop\\image003.png", CV_LOAD_IMAGE_COLOR);  

 //If image not found  
       if (!image.data)                                                             
     {  
      cout << "No image data \n";  
      return -1;  
     } 


    while(1)
  {
     //Taking inputs from the user for the co-ordinates of the image 
     int i,j;
     cout<<"Enter the co-ordinates of the image where you want to find the pixel value (i,j): \n";
  cout<<"i<"<<image.rows<<"\t"<<"&"<<"\t"<<"j<"<<image.cols<<"\n";
     
  cout<<"i= ";  cin>>i;
     cout<<"j= ";  cin>>j;
    
  if(i < image.rows) 
    { 
            if(j < image.cols)
   {
           //Reading pixel value at location (i,j)
              Vec3b imagepixel = image.at<Vec3b>(i,j); 
           //Displaying the pixel value                                                        
              cout<<"imagepixel(BGR)="<<imagepixel<<"\n" ;
          }  
        }
      else
        { 
      cout<<"Image Co-ordinates value out of range \n"; 
        }

      }
        return 0; 
      }

__________________________________________________________

Here is the link of the code for accessing dynamically pixel value of the image:
 _________________________________________________________
Output:
code-dynamic-access-pixel-value-output-image-opencv

__________________________________________________________
 Image:
original-image-opencv

___________________________________________________________

3. 
Code for accessing the full pixel value of an image just by using cout function:

Here we have used cout;
See the difference between Code 3. and Code4.
Code:
/*Displaying the Pixel value of the whole Image*/
#include <opencv2/core/core.hpp>  
#include <opencv2/highgui/highgui.hpp>  
#include <iostream> 

  using namespace std;  
  using namespace cv;  

int main() 
  {  
    Mat image; 
 //Reading the color image 
    image = imread("C:\\Users\\arjun\\Desktop\\image003.png", CV_LOAD_IMAGE_COLOR);  

  if (!image.data)             //If image not found                                                             
     {  
      cout << "No image data \n";  
      return -1;  
     } 
    cout<<image ;              //Displaying the pixel value  of the whole image
    namedWindow("Display Image");               //Display the original image
    imshow("Display Image", image);  
    waitKey(0);
    return 0;
      }
  
___________________________________________________

Here is the link of the code below:
_______________________________________________________________
 Output:

code-pixel-value-of-full-image-cout-output-opencv

___________________________________________________
4. Code for accessing the full pixel value of an image just by using for loop and Vec3b function:
/*Displaying the Pixel value of the whole Image using Loops*/

#include <opencv2/core/core.hpp>  
#include <opencv2/highgui/highgui.hpp>  
#include <iostream> 

  using namespace std;  
  using namespace cv;  

int main() 
  {  
    Mat image; 
 //Reading the color image 
    image = imread("C:\\Users\\arjun\\Desktop\\image003.png", CV_LOAD_IMAGE_COLOR);  

 //If image not found 
 if (!image.data)                                                                          
     {  
      cout << "No image data \n";  
      return -1;  
     } 


 //for loop for counting the number of rows and columns and displaying the pixel value at each point
   for (int i = 0; i < image.rows; i++) 
   { 
      for (int j = 0; j < image.cols; j++) 
    { 
         Vec3b imagepixel = image.at<Vec3b>(i, j);
      cout<<imagepixel ;   //Displaying the pixel value  of the whole image
     } 
   }
     namedWindow("Display Image");               //Display the original image
     imshow("Display Image", image);  
      waitKey(0);
      return 0;
        }


Here we have used for loops along with Vec3b to display the pixel value at each row and column.
_____________________________________________________
Output:
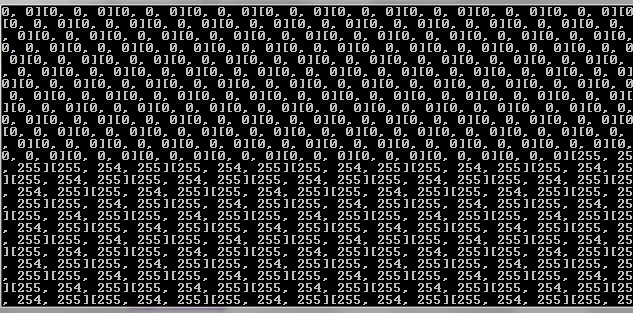
code-pixel-value-of-full-image-for-loop-vec3b-function-output-opencv


____________________________________________________

Here is the link of the code:
____________________________________________________
Note the difference in the output of the two codes.
In the output of the 4th code all the pixel values are represented in BGR format as [ B,G,R] e.g [0,0,255].


Sunday, 7 June 2015

Reading images sequentially without using videocapture function or displaying image successively using for loop

Reading images using successive frames in OpenCv without using VideoCapture function:
OR
Reading images using a for loop in OpenCV

We want to read images in a folder by using for loop.
Thus we need to number the images sequentially

Here i have renamed the images as image001.png , image002.png etc.

Note:
You just need to rename the image sequentially and provide a proper path to it.
It can be any type of image .bmp , .jpg, .png etc.
For e.g Arjun001.jpg , Arjun002.jpg ,Arjun003.jpg etc
But the name which you are using before the sequence should be given in the path while coding.

Here is the code below:
 Here the path to my image file is C:\Users\arjun\Desktop.

While the name of my image starts from "image" i.e. image001.png
If it was Arjun001.png then the path should have been:
C:\\Users\\arjun\\Desktop\\Arjun

%03i denotes the no of zeros in the name and total size of the string for e.g 001 , 002 , 003, 004 etc
So change your name accordingly if you make changes in the code.
Here %03i denotes there are there digits in the number with the last digit being ‘i’ and preceding it are all zeroes.

Explanation of the code:
//defines the variable 'filename' taking character input of max 100.
char filename[100]

sprintf(filename, "C:\\Users\\arjun\\Desktop\\image,number");
//The sprintf() function prototype is
int sprintf(char *str, const char *format, arg_1, arg_2, arg_3, ... , arg_n);
Composes a string with the same text that would be printed if format was used on printf, but instead of being printed, the content is stored as a C string in the buffer pointed by str.

//The image is loaded by a function cvLoadImage in a variable called 'image'
image = cvLoadImage(filename);

//No. of image =6
 int nImages = 6;

//For loop for concating the path of the image
for (int i = 1; i &lt; nImages; ++i);
 {
  loadImage(im, i);
  char filename[100];
  strcpy(filename, "C:\\Users\\arjun\\Desktop\\image");
   char frameNo[10];
   sprintf(frameNo, "%03i", i);

  strcat(filename, frameNo);
  strcat(filename, ".png");

//Load the image
  IplImage *im = cvLoadImage(filename,CV_LOAD_IMAGE_COLOR);
  cvNamedWindow("pic");        //Name of the image window 
  cvShowImage("pic",im);         //Display the image window
  cvWaitKey(1000);                  //Wait for 1 sec
  }


 Here is the link of the code:
Here is the code:
/* Read images using successive frames in OpenCv without using VideoCapture function*/
#include "stdlib.h"
#include "math.h"
#include "opencv/cv.h"       // include it to used Main OpenCV functions.
#include "opencv/highgui.h"  //include it to use GUI functions.

 using namespace std;
 using namespace cv;

void loadImage(IplImage *image, int number)
  {
    // Store path to directory
    char filename[100];
    sprintf(filename, "C:\\Users\\arjun\\Desktop\\image,number");
    image = cvLoadImage(filename);
  }

  int main(int argc, char* argv[])
  {
   IplImage *im=0;
   int nImages = 6;
   for (int i = 1; i < nImages; ++i)
     {
       loadImage(im, i);
       char filename[100];
       strcpy(filename, "C:\\Users\\arjun\\Desktop\\image");
       char frameNo[10];
       sprintf(frameNo, "%03i", i);
    strcat(filename, frameNo);
       strcat(filename, ".png");
       IplImage *im = cvLoadImage(filename,CV_LOAD_IMAGE_COLOR);
       cvNamedWindow("pic");
       cvShowImage("pic",im);
       cvWaitKey(1000);
     }
  }

Tuesday, 2 June 2015

OpenCV-Image Loading and Saving it using imwrite

This Opencv tutorial is about loading and Saving an Image

Imread Syntax:
Mat imread(const string& filename, int flags=1 )

Parameters:               
filename – Name of file to be loaded.
flags –Flags specifying the color type of a loaded image:

CV_LOAD_IMAGE_ANYDEPTH - If set, return 16-bit/32-bit image when the input has the corresponding depth, otherwise convert it to 8-bit.
CV_LOAD_IMAGE_COLOR - If set, always convert image to the color one
CV_LOAD_IMAGE_GRAYSCALE - If set, always convert image to the grayscale one

>0 Return a 3-channel color image.
=0 Return a grayscale image.
<0 Return the loaded image as is (with alpha channel).

Image Format Supported in OPENCV:
Windows bitmaps - *.bmp, *.dib (always supported)
JPEG files - *.jpeg, *.jpg, *.jpe (see the Notes section)
JPEG 2000 files - *.jp2 (see the Notes section)
Portable Network Graphics - *.png (see the Notes section)
Portable image format - *.pbm, *.pgm, *.ppm (always supported)
Sun rasters - *.sr, *.ras (always supported)
TIFF files - *.tiff, *.tif (see the Notes section)

Imwrite Syntax:
bool imwrite(const string& filename, InputArray img, const vector<int>& params=vector<int>() )
Parameters:               
filename – Name of the file.
image – Image to be saved.
params –Format-specific save parameters encoded as pairs paramId_1, paramValue_1, paramId_2, paramValue_2, ... . The following parameters are currently supported:

For JPEG, it can be a quality ( CV_IMWRITE_JPEG_QUALITY ) from 0 to 100 (the higher is the better). Default value is 95.

For PNG, it can be the compression level ( CV_IMWRITE_PNG_COMPRESSION ) from 0 to 9. A higher value means a smaller size and longer compression time. Default value is 3.

For PPM, PGM, or PBM, it can be a binary format flag ( CV_IMWRITE_PXM_BINARY ), 0 or 1. Default value is 1.

#include "opencv2/core/core.hpp"
#include "opencv2/highgui/highgui.hpp"
#include "iostream"

using namespace cv;
using namespace std;

int main( int argc, char** argv )
{
 Mat image1,image2;

// Read the file
image1 = imread("C:\\Users\\arjun\\Desktop\\opencv-logo.jpg",CV_LOAD_IMAGE_COLOR);
// Check for invalid input
 if(! image1.data )                              
    {
        cout << "Could not open or find the image" << std::endl ;
        return -1;
    } 

//Write the File
imwrite( "C:\\Users\\arjun\\Desktop\\opencv-logo-new.jpg",image1);

// Read the Writen File
image2 =imread("C:\\Users\\arjun\\Desktop\\opencv-logo-new.jpg",CV_LOAD_IMAGE_COLOR);  
   

 namedWindow("Image1");
 imshow("Image1",image1);

 namedWindow("Image2");
 imshow("Image2",image2);
 waitKey(0);

}

Here we are first reading the image using: imread() . Note the Location of the image is: C:\Users\arjun\Desktop\a.jpg where "old.jpg" is the name of my image. (The path of the image file can be directly obtained by right clicking it and Selecting Properties. The location field gives the path of the image. Here we append additional "\" after each file or folder name. Now the file can be saved by using the function imwrite() in the desired Location. Here i have set the path as: C:\Users\arjun\Desktop\new.jpg where "new.jpg" is the name of my saved image.
Note: 
Compare the Size of old image and the new image which is saved using imwrite().
Is there any difference of size if yes then why?